Strategy vault / Trend following
Advanced WaveTrend and EMA Ribbon Fusion Trading Strategy
This strategy is an advanced trading system that combines the WaveTrend oscillator indicator with EMA ribbons. By integrating these two technical indicators, it creates a trading strategy capable of accurately…
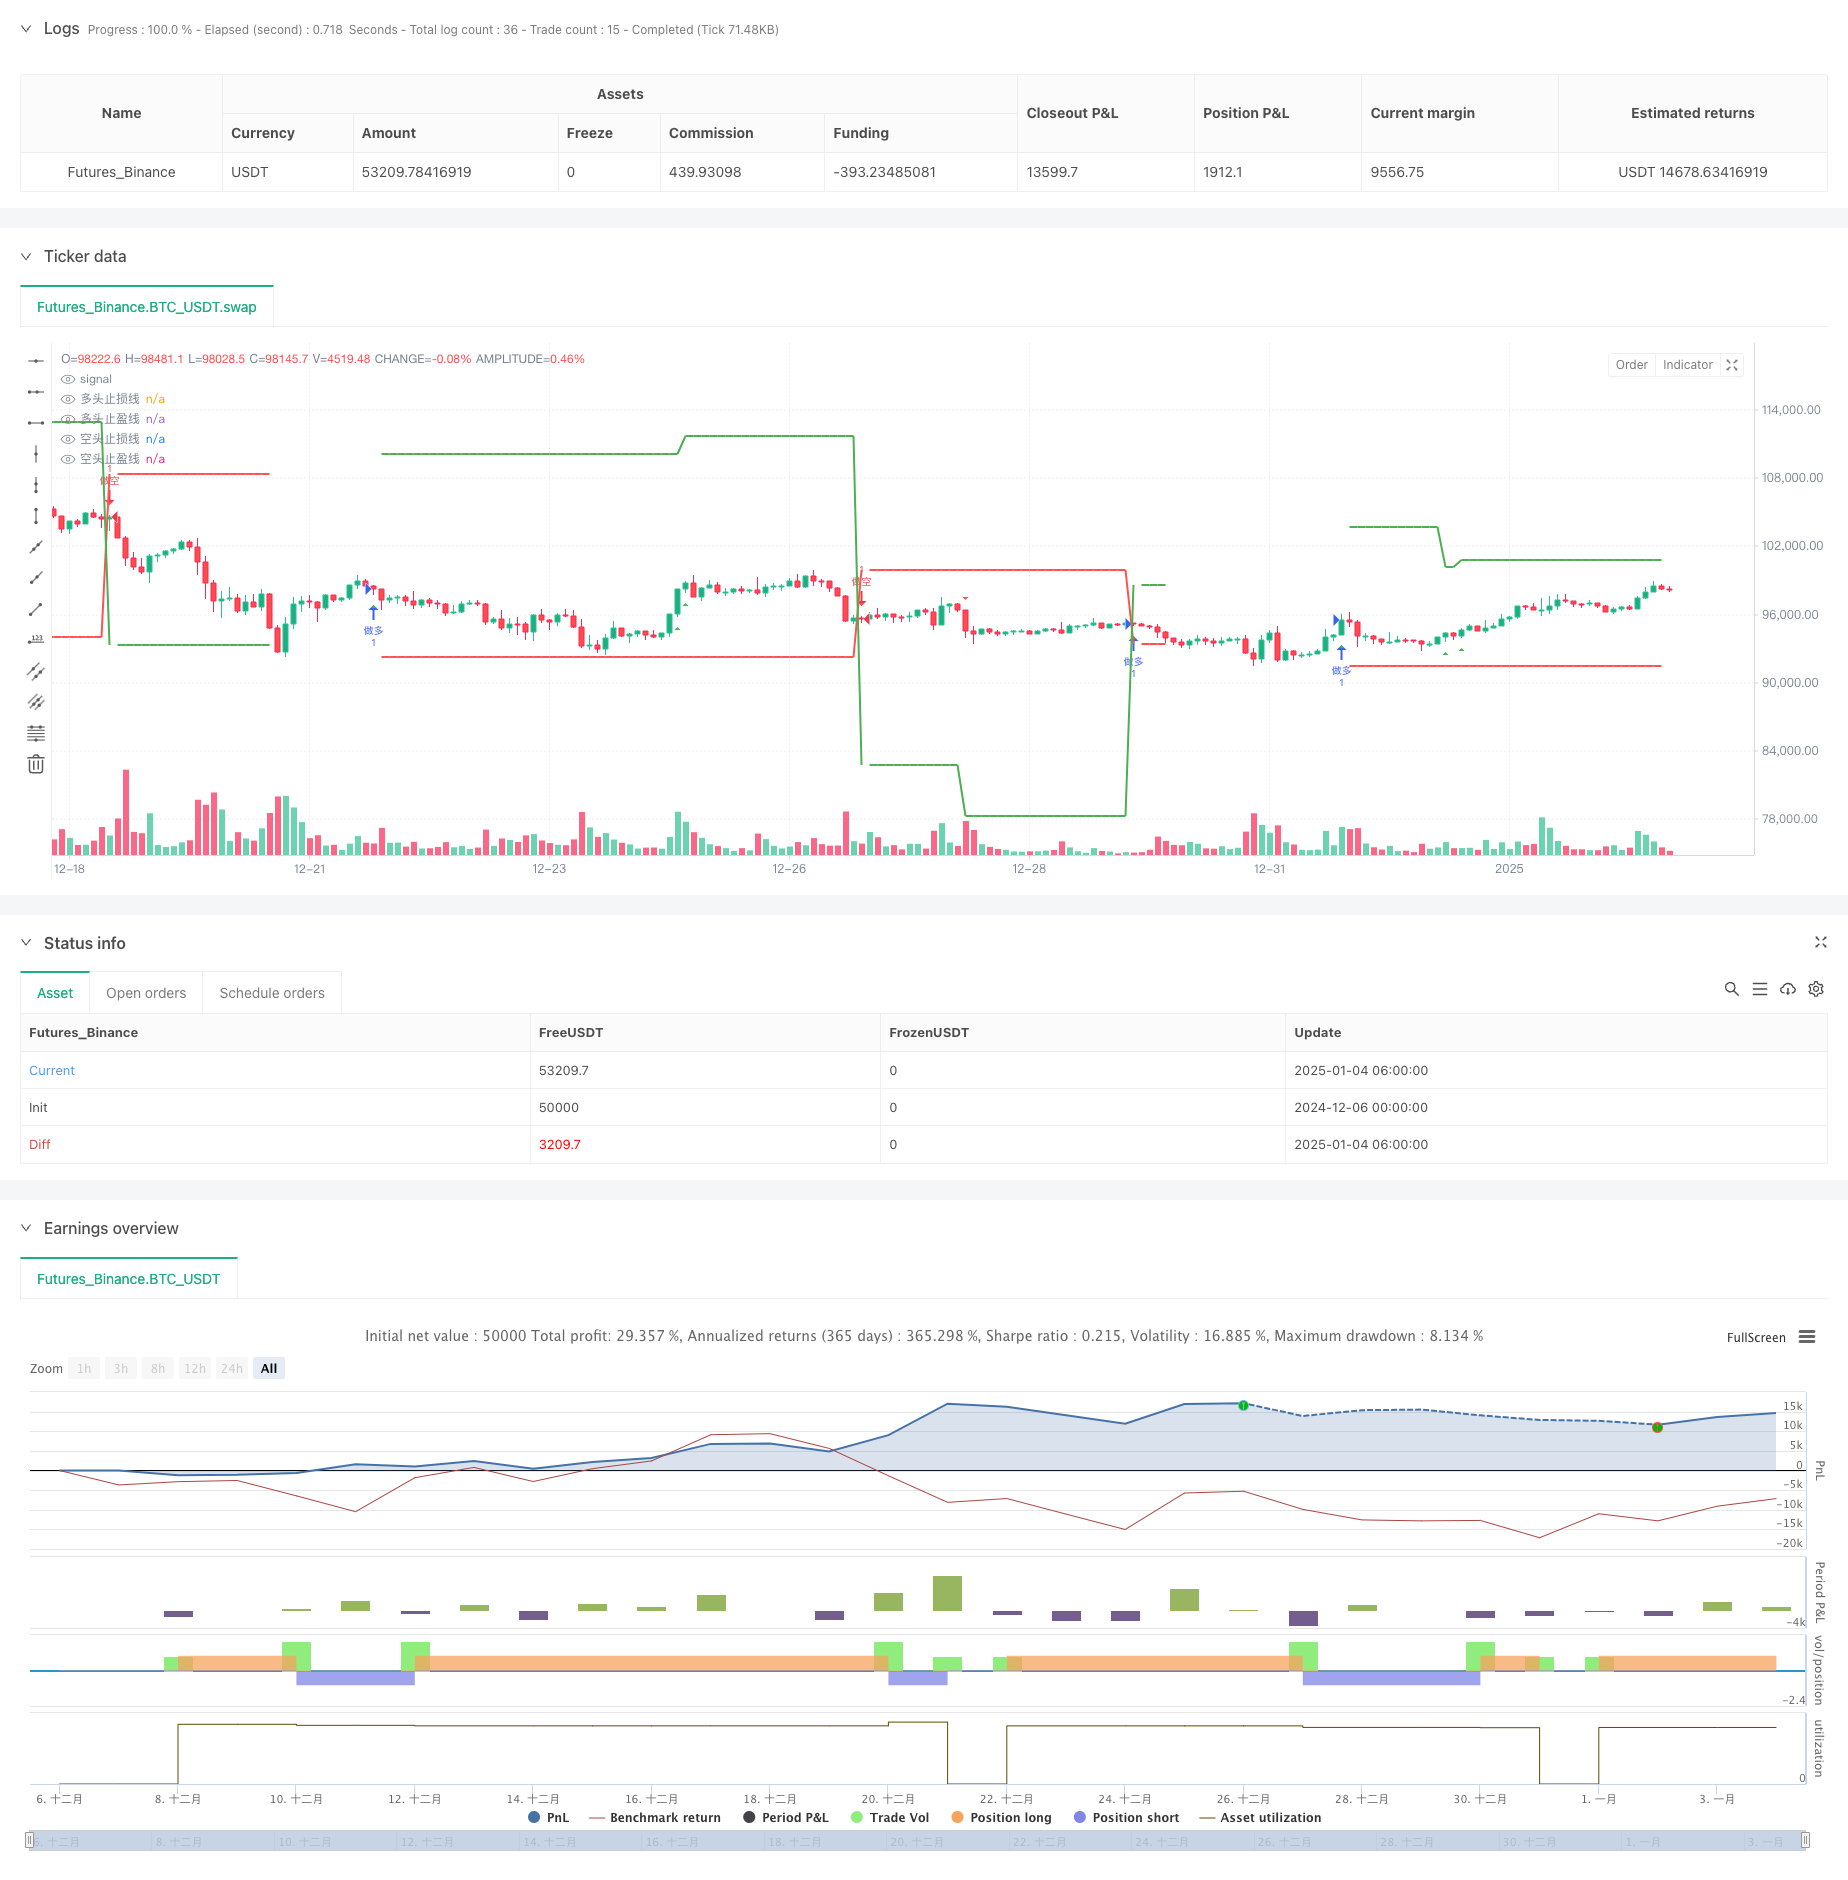
Overview
This strategy is an advanced trading system that combines the WaveTrend oscillator indicator with EMA ribbons. By integrating these two technical indicators, it creates a trading strategy capable of accurately capturing market trend reversal points. The strategy employs dynamic stop-loss and take-profit settings to pursue higher returns while protecting capital.
Strategy Principles
The core of the strategy lies in the synergistic use of the WaveTrend indicator and eight EMA lines to identify trading signals. The WaveTrend indicator measures market overbought and oversold conditions by calculating the deviation between price and moving averages. The EMA ribbon confirms trend direction through crossovers of different period moving averages. Specifically:
- Long signals are triggered when EMA2 crosses above EMA8, or when a blue triangle signal appears (EMA2 crosses above EMA3) without a blood diamond pattern
- Short signals are triggered when EMA8 crosses above EMA2, or when a blood diamond pattern appears
- Stop-loss is set at the extreme point after the previous counter signal, effectively controlling risk
- Take-profit targets are set at 2-3 times the stop-loss distance, demonstrating a good risk-reward ratio
Strategy Advantages
- Dual confirmation mechanism improves trading signal reliability
- Dynamic stop-loss settings better adapt to market volatility
- Clear risk-reward ratio settings
- EMA ribbon helps determine overall market trends
- WaveTrend indicator effectively identifies market overbought/oversold conditions
- Clear strategy logic that's easy to understand and execute
Strategy Risks
- May generate frequent false signals in ranging markets
- Dynamic stops may be easily triggered during severe volatility
- Indicators based on historical data may fail during market regime changes
- Multiple technical indicators may lead to signal lag Solutions:
- Add volatility filters to reduce false signals in ranging markets
- Consider using wider stop-loss settings
- Add trend strength confirmation mechanisms
Optimization Directions
- Introduce volatility indicators (like ATR) for dynamic stop-loss adjustment
- Add volume confirmation mechanism to improve signal reliability
- Consider adding trend strength filters to trade only in strong trend markets
- Optimize WaveTrend parameters for better adaptation to different market conditions
- Study signal synergy across different timeframes
Summary
This is a complete trading system that combines trend following and oscillator indicators in technical analysis. Through the coordinated use of WaveTrend and EMA ribbons, it can both capture major trends and enter timely at trend reversal points. The dynamic stop-loss and take-profit management mechanism provides good risk control capability. Strategy optimization potential mainly lies in improving signal filtering and risk management.
Source Pine Script
/*backtest
start: 2024-12-06 00:00:00
end: 2025-01-04 08:00:00
period: 2h
basePeriod: 2h
exchanges: [{"eid":"Futures_Binance","currency":"BTC_USDT"}]
*/

//@version=5
strategy("VuManChu Cipher A Strategy", overlay=true, initial_capital=10000, default_qty_type=strategy.fixed, default_qty_value=1.0)

// === Function Definition ===
// WaveTrendFunction
f_wavetrend(_src, _chlen, _avg, _malen) =>
    _esa = ta.ema(_src, _chlen)
    _de = ta.ema(math.abs(_src - _esa), _chlen)
    _ci = (_src - _esa) / (0.015 * _de)
    _tci = ta.ema(_ci, _avg)
    _wt1 = _tci
    _wt2 = ta.sma(_wt1, _malen)
    [_wt1, _wt2]

// EMA RibbonFunction
f_emaRibbon(_src, _e1, _e2, _e3, _e4, _e5, _e6, _e7, _e8) =>
    _ema1 = ta.ema(_src, _e1)
    _ema2 = ta.ema(_src, _e2)
    _ema3 = ta.ema(_src, _e3)
    _ema4 = ta.ema(_src, _e4)
    _ema5 = ta.ema(_src, _e5)
    _ema6 = ta.ema(_src, _e6)
    _ema7 = ta.ema(_src, _e7)
    _ema8 = ta.ema(_src, _e8)
    [_ema1, _ema2, _ema3, _ema4, _ema5, _ema6, _ema7, _ema8]

// === Variable Declaration ===
var float stopPrice = na      // Stop-loss price variable
var float targetPrice = na    // Take-profit price variable
var float lastLongPrice = na
var float lastShortPrice = na
var float highestSinceLastLong = na
var float lowestSinceLastShort = na

// === WaveTrendParameters ===
wtChannelLen = input.int(9, title = 'WT Channel Length')
wtAverageLen = input.int(13, title = 'WT Average Length')
wtMASource = hlc3
wtMALen = input.int(3, title = 'WT MA Length')

// === EMA RibbonParameters ===
ema1Len = input.int(5, "EMA 1 Length")
ema2Len = input.int(11, "EMA 2 Length")
ema3Len = input.int(15, "EMA 3 Length")
ema4Len = input.int(18, "EMA 4 Length")
ema5Len = input.int(21, "EMA 5 Length")
ema6Len = input.int(24, "EMA 6 Length")
ema7Len = input.int(28, "EMA 7 Length")
ema8Len = input.int(34, "EMA 8 Length")

// === Calculate indicator ===
// WaveTrendCalculation
[wt1, wt2] = f_wavetrend(wtMASource, wtChannelLen, wtAverageLen, wtMALen)

// WaveTrendCrossover Condition
wtCross = ta.cross(wt1, wt2)
wtCrossDown = wt2 - wt1 >= 0

// EMA RibbonCalculation
[ema1, ema2, ema3, ema4, ema5, ema6, ema7, ema8] = f_emaRibbon(close, ema1Len, ema2Len, ema3Len, ema4Len, ema5Len, ema6Len, ema7Len, ema8Len)

// === Trading signals ===
longEma = ta.crossover(ema2, ema8)
shortEma = ta.crossover(ema8, ema2)
redCross = ta.crossunder(ema1, ema2)
blueTriangle = ta.crossover(ema2, ema3)
redDiamond = wtCross and wtCrossDown
bloodDiamond = redDiamond and redCross

// Update the highest and lowest price
if not na(lastLongPrice)
    highestSinceLastLong := math.max(high, nz(highestSinceLastLong))
if not na(lastShortPrice)
    lowestSinceLastShort := math.min(low, nz(lowestSinceLastShort))

// === Trading signal conditions ===
longCondition = longEma or (blueTriangle and not bloodDiamond)
shortCondition = shortEma or bloodDiamond

// === Execute Trade ===
if (longCondition)
    // Record long entry price
    lastLongPrice := close
    // Reset high price tracking
    highestSinceLastLong := high

    stopPrice := nz(lowestSinceLastShort, close * 0.98)  // Use the lowest price since the previous short signal as stop loss
    float riskAmount = math.abs(close - stopPrice)
    targetPrice := close + (riskAmount * 2)  // Take profit is twice the stop-loss distance

    strategy.entry("go long", strategy.long)
    strategy.exit("Long position take-profit and stop-loss", "go long", limit=targetPrice, stop=stopPrice)

if (shortCondition)
    // Record short entry price
    lastShortPrice := close
    // Reset lowest price tracking
    lowestSinceLastShort := low

    stopPrice := nz(highestSinceLastLong, close * 1.02)  // Use the highest price since the previous long signal as stop loss
    float riskAmount = math.abs(stopPrice - close)
    targetPrice := close - (riskAmount * 3)  // Take profit is twice the stop-loss distance

    strategy.entry("go short", strategy.short)
    strategy.exit("Short position take-profit and stop-loss", "go short", limit=targetPrice, stop=stopPrice)

// === Plot Signal ===
plotshape(longCondition, style=shape.triangleup, color=color.green, location=location.belowbar, size=size.small, title="Long Signal")
plotshape(shortCondition, style=shape.triangledown, color=color.red, location=location.abovebar, size=size.small, title="Short Signal")

// Draw stop loss line
plot(strategy.position_size > 0 ? stopPrice : na, color=color.red, style=plot.style_linebr, linewidth=2, title="Long stop loss line")
plot(strategy.position_size < 0 ? stopPrice : na, color=color.red, style=plot.style_linebr, linewidth=2, title="Short stop loss line")

// Draw take profit line
plot(strategy.position_size > 0 ? targetPrice : na, color=color.green, style=plot.style_linebr, linewidth=2, title="Long position take-profit line")
plot(strategy.position_size < 0 ? targetPrice : na, color=color.green, style=plot.style_linebr, linewidth=2, title="Short position take-profit line")Published by ChaoZhang on the FMZ strategy square · last modified 2025-01-06. Collected in the Quant Trading Vault. Unvalidated research: re-test with your own data and costs before trusting it.
Build this with AgenKit
A spec is not a trading system. Paste this into your coding agent and AgenKit runs a specialist team — architecture, test-first build, risk gates, review — with paper trading on by default.
/agenkit build a production-grade trading bot with a backtest engine, risk controls and paper trading by default from strategies/Advanced-WaveTrend-and-EMA-Ribbon-Fusion-Trading-Strategy.md- npx agenkit install engineering-kit in your project
- Paste the command into your agent and approve each phase
- Get tests, backtest, risk controls and a paper-trading switch
Understand it first
Before you run this, read the lesson behind the idea and how to backtest it honestly. Specs like this one are the survivors of an unknown number of trials; deflate their results accordingly.
Related specs
- Fixed Range Volume Profile And Anchored VWAP Trend Identification Strategy With Dynamic Stop LossPine Script · Trend following · 1h
- Multi Factor Trend Price Action Strategy with Dynamic Risk Management SystemPine Script · Trend following · 2h
- Multi Period Moving Average Ribbon and MACD Crossover Strategy SystemPine Script · Trend following · 1h
- Trend Following Strategy Based on Moving Average 439858Pine Script · Trend following · 1d
- DPO EMA Trend Crossover Quantitative Strategy ResearchPine Script · Trend following · 1d
- Dual EMA Crossover Trend Following Strategy with ATR and ADX FiltersPine Script · Trend following · 1d