Multi Target Intelligent Volume Momentum Trading Strategy
This strategy is an intelligent trading system that combines volume, price momentum, and multiple take-profit/stop-loss levels. It identifies potential trading opportunities through a combination of volume anomaly…
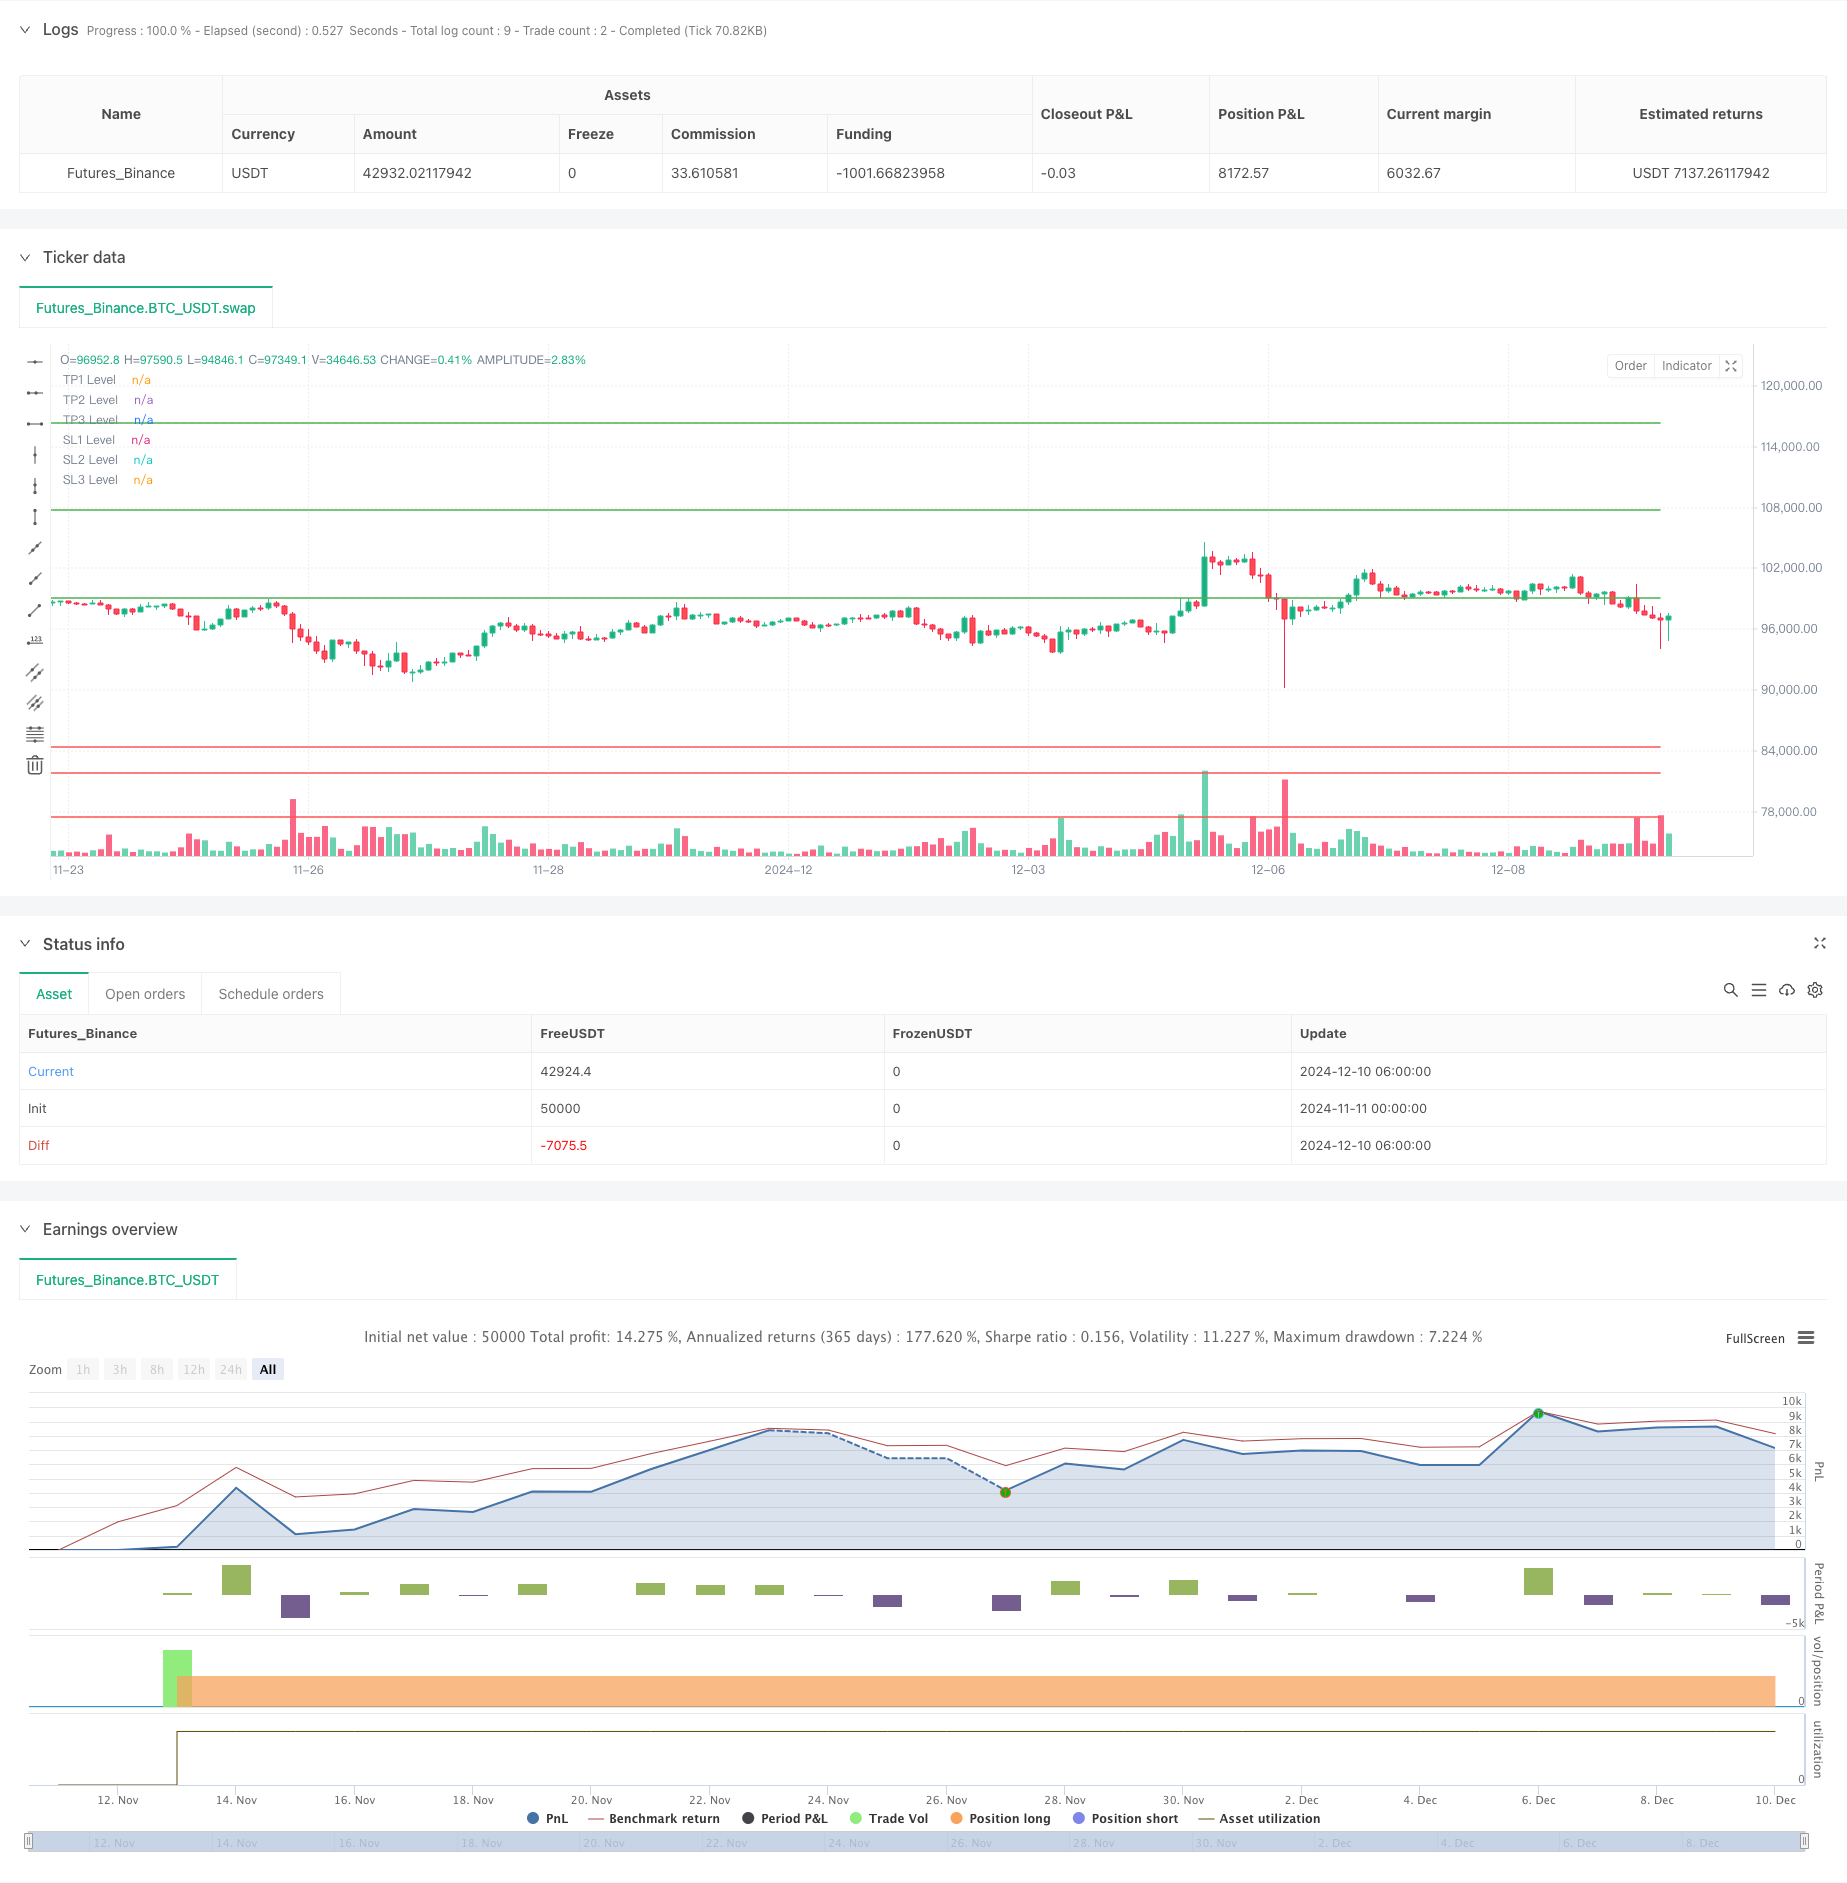
This strategy is an intelligent trading system that combines volume, price momentum, and multiple take-profit/stop-loss levels. It identifies potential trading opportunities through a combination of volume anomaly detection, price gains, and momentum indicators, using layered profit-taking and stop-loss management to optimize risk-reward ratios.
Strategy Principles
The strategy is based on three core trading signals: 1) Volume breakthrough - current volume exceeds 2x the 20-period average volume; 2) Price gain - recent price increase exceeds set threshold; 3) Momentum confirmation - RSI above 55 and price above 50-period SMA. When these three conditions are met simultaneously, the system generates a long signal. The strategy employs triple take-profit levels (15%, 25%, 35%) and triple stop-loss levels (-2%, -5%, -10%) for position management, with flexible position sizing at each level.
Strategy Advantages
- Multiple signal confirmation improves trading accuracy
- Layered take-profit/stop-loss approach both secures profits and controls risks
- Highly customizable parameters adapt to different market conditions
- Combination of technical indicators and volume analysis provides more reliable signals
- Real-time alert functionality enables timely opportunity capture
Strategy Risks
- Improper parameter settings may lead to overtrading
- Frequent stop-losses may trigger during high market volatility
- Difficulty in executing take-profits/stop-losses in low liquidity markets
- Missing important fundamental factors
- Over-reliance on technical indicators may fail in ranging markets
Optimization Directions
- Introduce market condition analysis for parameter adaptation
- Add volume quality analysis to filter false volume signals
- Include trend strength indicators to improve trend following capability
- Optimize take-profit/stop-loss spacing to match market volatility
- Consider adding drawdown control for improved equity curve stability
Summary
This is a mature trading strategy integrating multiple technical analysis elements. Through strict signal filtering and flexible position management, it captures trending opportunities while maintaining good risk control. Although there is room for optimization, the overall design is sound and worthy of validation and implementation in live trading.
Source Pine Script
/*backtest
start: 2024-11-11 00:00:00
end: 2024-12-10 08:00:00
period: 2h
basePeriod: 2h
exchanges: [{"eid":"Futures_Binance","currency":"BTC_USDT"}]
*/

//@version=5
strategy("Volume Spike & Momentum Strategy with Alerts", overlay=true)

// Inputs for customization
priceGainPercent = input.float(5, title="Minimum Price Gain (%)", minval=1)
volumeLookback = input.int(20, title="Volume Lookback Period (Bars)", minval=1)
momentumSmaLength = input.int(50, title="SMA Length for Momentum (Bars)", minval=1)
rsiThreshold = input.float(55, title="RSI Threshold for Momentum", minval=1)

// Take Profit percentages
tp1Percent = input.float(15, title="Take Profit 1 (%)", minval=1)
tp2Percent = input.float(25, title="Take Profit 2 (%)", minval=1)
tp3Percent = input.float(35, title="Take Profit 3 (%)", minval=1)

// Percentage of position to close at each take-profit
tp1ClosePercent = input.float(30, title="Close % at TP1", minval=1, maxval=100)
tp2ClosePercent = input.float(40, title="Close % at TP2", minval=1, maxval=100)
tp3ClosePercent = input.float(30, title="Close % at TP3", minval=1, maxval=100)

// Stop-loss percentages
sl1Percent = input.float(2, title="Stop Loss 1 (%)", minval=0.1)
sl2Percent = input.float(5, title="Stop Loss 2 (%)", minval=0.1)
sl3Percent = input.float(10, title="Stop Loss 3 (%)", minval=0.1)

// Percentage of position to close at each stop-loss
sl1ClosePercent = input.float(30, title="Close % at SL1", minval=1, maxval=100)
sl2ClosePercent = input.float(40, title="Close % at SL2", minval=1, maxval=100)
sl3ClosePercent = input.float(30, title="Close % at SL3", minval=1, maxval=100)

// Detect volume spikes
avgVolume = ta.sma(volume, volumeLookback)   // Average volume over the last X bars (customizable)
volumeSpike = volume > avgVolume * 2         // Spike in volume if current volume is 2x the average

// Detect price gain over the recent period (e.g., 5-10% gain over the last X bars)
priceChangePercent = (close - ta.lowest(close, 5)) / ta.lowest(close, 5) * 100
priceGainCondition = priceChangePercent >= priceGainPercent

// Check for overall momentum using an SMA and RSI
longTermSma = ta.sma(close, momentumSmaLength)
rsi = ta.rsi(close, 14)
momentumCondition = close > longTermSma and rsi >= rsiThreshold

// Store the entry price on a new trade
var float entryPrice = na
if (strategy.opentrades == 0 and (volumeSpike and priceGainCondition and momentumCondition))
    entryPrice := close  // Capture the entry price on a new trade

// Calculate take-profit levels based on the entry price
tp1Price = entryPrice * (1 + tp1Percent / 100)
tp2Price = entryPrice * (1 + tp2Percent / 100)
tp3Price = entryPrice * (1 + tp3Percent / 100)

// Calculate stop-loss levels based on the entry price
sl1Price = entryPrice * (1 - sl1Percent / 100)
sl2Price = entryPrice * (1 - sl2Percent / 100)
sl3Price = entryPrice * (1 - sl3Percent / 100)

// Exit conditions for multiple take-profits
tp1Condition = high >= tp1Price  // Exit partial if price hits take-profit 1
tp2Condition = high >= tp2Price  // Exit partial if price hits take-profit 2
tp3Condition = high >= tp3Price  // Exit full if price hits take-profit 3

// Exit conditions for multiple stop-losses
sl1Condition = low <= sl1Price  // Exit partial if price hits stop-loss 1
sl2Condition = low <= sl2Price  // Exit partial if price hits stop-loss 2
sl3Condition = low <= sl3Price  // Exit full if price hits stop-loss 3

// Buy Condition: When volume spike, price gain, and momentum conditions are met
if (volumeSpike and priceGainCondition and momentumCondition)
    strategy.entry("Buy", strategy.long)

// Alerts for conditions
alertcondition(volumeSpike and priceGainCondition and momentumCondition, title="Entry Alert", message="Entry conditions met: Volume spike, price gain, and momentum detected!")

alertcondition(tp1Condition, title="Take Profit 1", message="Take Profit 1 hit!")
alertcondition(tp2Condition, title="Take Profit 2", message="Take Profit 2 hit!")
alertcondition(tp3Condition, title="Take Profit 3", message="Take Profit 3 hit!")

alertcondition(sl1Condition, title="Stop Loss 1", message="Stop Loss 1 hit!")
alertcondition(sl2Condition, title="Stop Loss 2", message="Stop Loss 2 hit!")
alertcondition(sl3Condition, title="Stop Loss 3", message="Stop Loss 3 hit!")

// Exit conditions: Multiple take-profits and stop-losses
if (tp1Condition)
    strategy.exit("Take Profit 1", "Buy", limit=tp1Price, qty_percent=tp1ClosePercent)

if (tp2Condition)
    strategy.exit("Take Profit 2", "Buy", limit=tp2Price, qty_percent=tp2ClosePercent)

if (tp3Condition)
    strategy.exit("Take Profit 3", "Buy", limit=tp3Price, qty_percent=tp3ClosePercent)

// Stop-loss exits
if (sl1Condition)
    strategy.exit("Stop Loss 1", "Buy", stop=sl1Price, qty_percent=sl1ClosePercent)

if (sl2Condition)
    strategy.exit("Stop Loss 2", "Buy", stop=sl2Price, qty_percent=sl2ClosePercent)

if (sl3Condition)
    strategy.exit("Stop Loss 3", "Buy", stop=sl3Price, qty_percent=sl3ClosePercent)

// Plotting take-profit and stop-loss levels on the chart
plot(tp1Price, color=color.green, style=plot.style_linebr, title="TP1 Level")
plot(tp2Price, color=color.green, style=plot.style_linebr, title="TP2 Level")
plot(tp3Price, color=color.green, style=plot.style_linebr, title="TP3 Level")

plot(sl1Price, color=color.red, style=plot.style_linebr, title="SL1 Level")
plot(sl2Price, color=color.red, style=plot.style_linebr, title="SL2 Level")
plot(sl3Price, color=color.red, style=plot.style_linebr, title="SL3 Level")
Published by ChaoZhang on the FMZ strategy square · last modified 2024-12-12. Collected in the Quant Trading Vault. Unvalidated research: re-test with your own data and costs before trusting it.
Build this with AgenKit
A spec is not a trading system. Paste this into your coding agent and AgenKit runs a specialist team — architecture, test-first build, risk gates, review — with paper trading on by default.
/agenkit build a production-grade trading bot with a backtest engine, risk controls and paper trading by default from strategies/Multi-Target-Intelligent-Volume-Momentum-Trading-Strategy.md- npx agenkit install engineering-kit in your project
- Paste the command into your agent and approve each phase
- Get tests, backtest, risk controls and a paper-trading switch
Understand it first
Before you run this, read the lesson behind the idea and how to backtest it honestly. Specs like this one are the survivors of an unknown number of trials; deflate their results accordingly.
Related specs
- KST EMA Momentum Trend Following StrategyPine Script · Momentum · 1d
- Multi EMA Trend Momentum Trading Strategy with Risk Management SystemPine Script · Momentum · 1h
- Multi Indicator MACD Momentum Options Strategy with Risk Controlled Percentage Based ExitsPine Script · Momentum · 1h
- Multi Indicator Trend Momentum Trading Strategy with Dynamic Risk Management SystemPine Script · Momentum · 1h
- Multi Timeframe Momentum Confluence Automated Trading StrategyPine Script · Momentum · 1h
- Multi Trend Momentum Crossover Strategy with Volatility Optimization SystemPine Script · Momentum · 1d